IJVM Project

1. Summary
- Time: 3 weeks
- Lines of code:3459
- Environment: Linux
- Coding style: Google C++
- Implemented bonus:
- Heap memory
- Garbage collection
- GUI
- Network communication
- Network multiple connection
- Snapshots
2. Skeleton
IJVM interface functions
- machine.c
- ijvm.c && ijvm.h
IJVM structure and Initial functions
- init.h && init.c
IJVM ISA implementation
- isa.h && isa.h
Stack structure and operations
- stack.h & stack.c
Heap structure and operations
- heap.h && heap.c
Garbage collection functions
- garbage_collection.h && garbage_collection.c
Network communication and multiple connection
- net.h && net.c
GUI
- ../gui/main_gui.c
Snapshots functions
- snapshots.h && snapshots.c
Utility functions
- util.h && util.c
3. Implementation
(1) Stack machine:
            |        ......        |
            |operation stack above | [...]<- sp
            |        old_lv        |
            |        old_pc        |
            |        var[2]        |
            |        var[1]        |
            |        var[0]        |
            |        ......        |
            |        arg[2]        |
            |        arg[1]        |
            |        arg[0]        |
            |        link_ptr      | [...]<- lv
            |        ......        | [2]
            |        ......        | [1]
            |       MAIN_FRAM      | [0]
(2) Heap memory
table ——>| Cell |
         |------|
         | Cell |
         |------|
         | Cell | ——> arrary ——>|[0]|[1]|[2]|... + |mark bit|
         |------|
         | Cell |
         |------|
         | Cell |
         |-....-|

array reference table ——> |[0]|[1]|[2]|...
(3) Garbage Collection
I implement two GC mechanisms but the last does not work in our PAD context.
- Mark and Sweep:
This mechanism will be triggered when the heap is full. It can also be triggered by the opcode OP_GC (0xD4)
- Mark phase: GC traverses the stack and marks every possible alive heap Cell. - Sweep phase: GC traverses the heap and frees all dead Cells. - Compact phase: I did not implement the memory compaction because I use NextFreeCell() to prevent memory fragmentation; NextFreeCell() will find the next free cell and the new array will be built in this location. In other words, I will reuse the freed location (free list) first. - Track each array reference
This mechanism will be triggered when a stack frame is destroyed.
Firstly, I built a tracking table when a new array was allocated. When a stack frame is destroyed, I check the tracking table and free all the array allocated by this frame (except the array that returns by this frame).
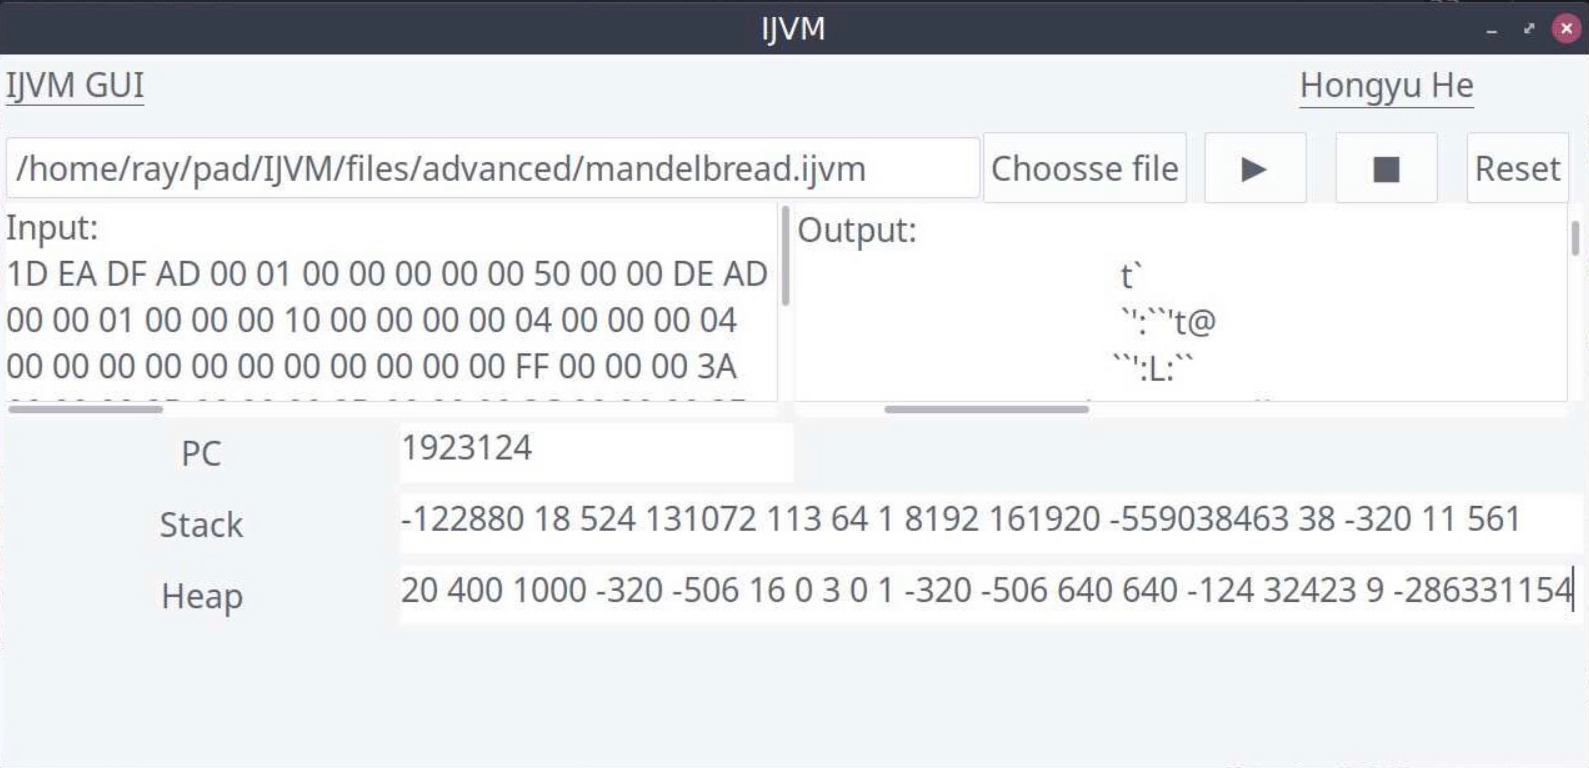
(4) GUI
I implement GUI using GTK2.0 rather that Nuklear. Dependency:
sudo apt-get install gtk2.0
sudo apt-get install gimp
sudo apt install libcanberra-gtk-module libcanberra-gtk3-module
sudo apt-get install libatk-adaptor libgail-common
Usage:
make ijvm-gui
./iivm-gui
(5) Network communication
- I use the normal socket API and TCP protocol.
- The opcode NETBIND (0xE1) will start the localhost server with the loopback address.
(6) Network multiple connection
- I use the netref argument as an identifier for the network connection and place the netref on the stack when a new connection is set up.
- I use the netref as an identifier to build a communication table for each client. When the opcode NETIN (0xE3) is triggered, the received data will be recorded in the corresponding communication table.
(7) Snapshots
When SIGINT is captured by the signal handler, the current IJVM instance will be saved in a file called ijvm.config.
Memory compaction:
I use 2 methods to compact the saved ijvm.config file:
- Instead of saving the entire main frame local variable array which has 2^16 words, I count the variable number when loading the program and only save these variable to the ijvm.config file.
- I discard the whole original program and only keep parsed text and constant pool sections. Usage:
./ijvm -r binaryor
./ijvm -resume binary
4. Compiling
Requires make and GCC or Clang
Run make ijvm to build the ijvm binary
You can enable the debug print (dprintf) found in include/util.h by
setting the -DDEBUG compiler flag (e.g., make clean && make testbasic CFLAGS=-DDEBUG).
5. Running a binary
Run an IJVM program using ./ijvm binary. For example ./ijvm files/advanced/Tanenbaum.ijvm.
6. Adding header files
Add your header files to the folder include.
7. Testing
To run a specific test run make run_testX (e.g. make run_test1).
- To run all basic tests, do
make testbasic. - To run all advanced tests, do
make testadvanced. - Check for memory leaks using
make testleaks - Check for memory errors/ undeifned behavior
make testsanitizers(requires LLVM) - To compile with pedantic flags:
make pedantic
You can debug the tests by running the binaries generated by
make build_tests through GDB.
8. Make gzipped tarball
Generate a gzipped tarball of your project using the make dist command.
Make sure to double check that all your required files are included in the tarball.
9. Compatibility
You need a valid C11 compiler, such as clang or gcc, as well as glibc. Do not use any non-standard libraries.
10. Windows
To develop on Windows, we recommend using the Windows Subsystem for Linux,
and installing Ubuntu from the Microsoft Store. Once you have gone through the
setup steps, you can access the Linux command line by executing bash from
the Windows command line. You can access your files in the Windows file system
through mount points (e.g. cd /mnt/c/Users/<username>/Desktop).
Both glibc, gcc, and make are included in the package build-essential. To
install this package, execute the following commands:
sudo apt-get updatesudo apt-get install build-essential
Now you can compile the project by navigating to this directory and executing
the make command.
11. Tools
You can install the goJASM assembler by executing make tools. This will
download a goJASM executable in the tools directory.